Wednesday, December 31, 2008

For the party that....wasn't

Hi Stampers,

This is the project stamp club was going to do at our Christmas party that the weather didn't allow! I promise though, we are doing this at our first club meeting in January. This was made for one of the challenges over on splitcoast. I took a piece of vellum cardstock, (not the same as regular vellum) and traced out the lampshade pattern and cut it out. Next, I used versamark to stamp the snowflake image, from the Country Living Holiday Collection, and the tree from my favorite stamp set, Lovely As A Tree. I took my versamark pad and just squished the corners of it on the vellum to create the "mountainish" effect. I then used white embossing powder and embossed the whole lampshade. I used sticky strip to adhere both sides together and there ya go! Very simple project to make! The "candle holder" is a wine glass I got at the Dollar Shop. As you see in the first pic, it looks great, even in daylight,
but just wait till the lights go out............
drumroll please.....
TADA!!!!
Isn't that just AWESOME?!?! This is probably the quickest, easiest thing I've ever made that looks this cool!
The photo has a real tealight candle in the glass, but I suggest a battery powered one if you want to leave it burning for longer periods of time.

You could try to use regular vellum, but be very careful when heat embossing, as I'm not sure if it will hold up to the heat quite as well as the cardstock does.

Be sure to be checking back...It wont be long until I post that blog candy...so keep looking!

Until then...Go Stamp Something!

TaTa

~Beth

Monday, December 29, 2008

New Year...New Club

Hi Stampers!
I hope you all had a VERY MERRY CHRISTMAS! Mine was fabulous!

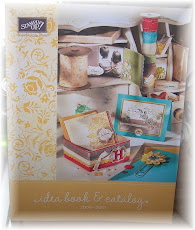
With the start of the new year, it's time to organize new stamp clubs. I'd like to have a Tuesday evening club, and a Saturday morning club, if I can get them both filled. So, call your girlfriends and co-workers and get them to join with ya! (It's always more fun with friends). For those of you who dont know, Stamp Club is a once monthly (for 10 months) committment to purchase $15 in product, and create 2 FABULOUS projects! Stamp club members get a FREE Idea Book & Catalog, and special discounts I dont offer to anyone else. This year, I will give a coupon book to each member that offers special discounts and bonus offers each month. WHAT A DEAL!! As an added bonus, club members also get the opportunity to participate in special events at a discounted rate. Oh, did I mention that you'll also get to be the hostess one month and get a Level 1 hostess set AND $15 free merchandise in your month?!?! So what are you waiting for? Contact me ASAP to get signed up!

I hope to be posting more frequently with the holidays nearly behind us, however, it's now my REALLY busy time of year doing income taxes. I have learned to schedule posts though, so hopefully I can get several scheduled on my days off so there will be something for you to look at regularly.

I've also almost hit a big milestone...100 hits on my blog. When we get there, I'll be offering some blog candy, so be sure to check back for that. The way to win is to leave a comment telling me what you'd like to see posted on here. I'll give more details on that later.

Thats about it for now...I'll post more later. Now, Go stamp something!
TaTa
~Beth

Monday, December 1, 2008

Ribbon Share Part 2


What is a ribbon share you ask? It's you sharing a spool of ribbon with others! LOL. Since we want it all, and cant afford it all, I am splitting it in to groups that we can all afford. The following is a list of the ribbons in the catalog that can easily be split between 5 people. I will focus on a specific group each month to help us all be able to get a nice sample of each. When at least 4 other people sign up to participate, I will order the ribbon, cut it and deliver the goods (or is it goodies) to you. For the month of December, I am focusing on the Assortment Variety. There is something about this wider ribbon that I just Love. It will be great wrapped around a gift or a card, and can also be used for hanging Christmas Ornaments. Next month I'll be focusing on the 5/8" Grosgrain Ribbon Share. Remember that the price listed includes all shipping and tax. All of the ribbon is shown on page 186-187 of the Idea Book & Catalog. Here we go:

1/4" Grosgrain Ribbon. =$23.00
You will receive 3 yards of each of the 20 colors. To purchase full spools of all 20 colors would cost you $115.00. With ribbon share, 3 yards of all 20 colors will cost you $23.00 and that includes shipping/tax.

1" Double-Stitched Grosgrain Ribbon.=$8.50
Receive 2 yards of each of the 4 colors, Rose Red, Baja Breeze, Bashful Blue and Chocolate Chip. To purchase all 4 would cost you $42.50, but with ribbon share, it's only $8.50.

5/8" Grosgrain Ribbon.=$14.50
That's right. Receive 3 yards each of all 8 colors in this size for $14.50. Retail value for all 8 spools is $72.50.

5/8" Striped Grosgrain Ribbon.=$14.00
Get 3 yards of each of the 6 new "In Color" striped grosgrain ribbon for $14.00, which includes shipping/tax. To order all 6 colors separately would be $70.

Gingham Ribbon.=$10.50
Yep, there are 6 different colors here too. Black, Red, Light Blue, Light Pink, Moss and Caramel checked gingham. This ribbon is about 3/16" wide. You'll get 3 yards of this share.

Taffeta Ribbon.=$14.00
ooh la la! This ribbon is gorgeous! You'll get 2 yards of each of the 9 different colors. Separate purchase would be $70.

Assortment Variety.=$11.50
This assortment includes 2 yards of each of the 3 colors of the 1/2" striped grosgrain ribbon in Bashful Blue, Pumpkin Pie and Real Red. Then there is the 1 1/4" grosgrain ribbon in Pink Pirouette. How about that 7/8" poly-twill ribbon in so saffron...and finally, the Kiwi Kiss double sided satin ribbon! Wow, talk about a variety! Yep, you get 2 yards of each of those. That's a total of 12 yards of ribbon for $11.50.

Contact me ASAP to let me know you're interested! Have a great day and Go Stamp Something!
~Beth

Wednesday, November 19, 2008

Gingerbread Man


For today's card, I pretty much copied from somebody. I'm sorry I dont recall where I got this. If it was you, drop me a line to let me know and I'll edit this post to give you credit.


I started with a 5 1/4 X 5 1/4" piece of Riding Hood Red cardstock. I love doing something besides the standard 5 1/2 X 4 1/4" sized card. This card is so simple and so basic, yet makes a pretty big statement. I used a 5 1/4" X 2 1/2" piece of the gingham DSP from the Bella paper. Can I just say I LOVE THIS PAPER! Anyway, I used the Scalloped Edge Punch and punched along the bottom of the DSP. I stamped the gingerbread man from Deer Friends hostess set three times and punched him out with the 1 1/4" punch. I punched more Riding Hood Red circles with the 1 3/8" punch and layered them together. I lined them up across the Bella gingham DSP, (and not very evenly I see), and stuck them down with Dimensionals. I used 1/4" White Grosgrain Ribbon to tie a knot across the top of the paper. I stamped the Celebrate in Whisper White and thats it! Talk about simple!!! Thats one of the great things about the designer series paper...you cant mess it up and it adds SO MUCH to your cards.
I have a workshop this week, and I think we may do something like this. It's so quick and easy, yet so cute everyone will love it.
Thanks for stopping by today...I hope you enjoyed it! Now...Go Stamp Something!
Ta Ta
~Beth

Tuesday, November 18, 2008

Challenging Lovely Tree


Todays card was made for the Color Challenge over on splitcoast. The challenge was to use Basic Black, Real Red and Kraft. While that sounds pretty simple, I found it a little bit challenging. There is a reason these are called challenges...thats exactly what they are! I think it's much easier to create my own card than to follow a challenge. I do however, greatly enjoy trying to create something with "rules".


I started with a 5 1/2X 8 1/2" piece of Real red cardstock folded in half. Next I used a 1/4" smaller piece of Basic Black and layered it over the red. Then I took my bigshot top note bigz die and cut out the Kraft piece of cardstock. I used the big pine tree from Lovely As A Tree and stamped it with White Craft Ink three times, not reinking in between. I put some dazzling diamonds glitter on the largest tree just to make it pop. Finally, I took my Real Red marker and colored around the edges of the top note die just to add some color. Now, notice the nice pink color at the bottom left? Thats what happens when you mix red and white. Just in case you didn't know, Red and White make PINK! My craft ink was still wet and I made a mess! Well, now you know...my secret is out. I KNOW HOW TO MAKE PINK! LOL! I used dimensionals to adhere the top note over a piece of Real Red 5/8" grosgrain ribbon and used brads to hold it all together. There ya have it...it's that simple. I should probably show you a photo of my red, er... uh, PINK fingers, but I cant photograph them while holding the camera...lol.
Dont forget about the Ribbon Share. All the details are a few posts down. Be sure to email me with any questions about it.
Thanks for dropping by today...Now go Stamp Something!
Ta Ta
~Beth

Monday, November 10, 2008

Two Cool Dudes!


Todays card uses the Two Cool Dudes stamp set featured on page 41 of the Idea Book & Catalog. This is a card that I contemplated for my Stamp A Stack, but it didn't quite make the cut. Maybe I'll get some pictures and show the "real" one this week. The snowman is stamped twice in Bashful Blue. That image is layered on a 1/4" larger piece of Pacific Pointe cardstock. I took a little help from the IB&C and cut him out and popped him up with dimensionals. The DSP from the Holiday Mini Catalog is called Frosty Day. How cute is Frosty with his Frosty Day paper!? I used the 5/8" Chocolate Chip Grosgrain Ribbon to tie around the edge. The snowflake from the same set was randomly stamped with versamark on the background piece of Bashful Blue. I used the brush tip of the Stampin' Write markers to color in his nose and scarf. This is a very simple, basic card. I can picture tons of possiblities with Frosty! Maybe even some jingle bells tied around his neck by his scarf?? Hmmm...I'll have to see what I can come up with.
Have a great day everybody! Now, Go Stamp Something!
Ta Ta
~Beth

Sunday, November 9, 2008

Share What??


Announcing.....New Ribbon Shares!

What is a ribbon share you ask? It's you sharing a spool of ribbon with others! LOL. Since we want it all, and cant afford it all, I am splitting it in to groups that we can all afford. The following is a list of the ribbons in the catalog that can easily be split between 5 people. I will focus on a specific group each month to help us all be able to get a nice sample of each. When at least 4 other people sign up to participate, I will order the ribbon, cut it and deliver the goods (or is it goodies) to you. For the month of November, I am focusing on the Taffeta Ribbon Share. This ribbon will be great for all of your Christmas cards and gift packaging. Next month I'll be focusing on the Assortment Variety Share. Remember that the price listed includes all shipping and tax. All of the ribbon is shown on page 186-187 of the Idea Book & Catalog. Here we go:
1/4" Grosgrain Ribbon. =$23.00
You will receive 3 yards of each of the 20 colors. To purchase full spools of all 20 colors would cost you $115.00. With ribbon share, 3 yards of all 20 colors will cost you $23.00 and that includes shipping/tax.
1" Double-Stitched Grosgrain Ribbon.=$8.50
Receive 2 yards of each of the 4 colors, Rose Red, Baja Breeze, Bashful Blue and Chocolate Chip. To purchase all 4 would cost you $42.50, but with ribbon share, it's only $8.50.
5/8" Grosgrain Ribbon.=$14.50
That's right. Receive 3 yards each of all 8 colors in this size for $14.50. Retail value for all 8 spools is $72.50.
5/8" Striped Grosgrain Ribbon.=$14.00
Get 3 yards of each of the 6 new "In Color" striped grosgrain ribbon for $14.00, which includes shipping/tax. To order all 6 colors separately would be $70.
Gingham Ribbon.=$10.50
Yep, there are 6 different colors here too. Black, Red, Light Blue, Light Pink, Moss and Caramel checked gingham. This ribbon is about 3/16" wide. You'll get 3 yards of this share.
Taffeta Ribbon.=$14.00
ooh la la! This ribbon is gorgeous! You'll get 2 yards of each of the 9 different colors. Separate purchase would be $70.
Assortment Variety.=$11.50
This assortment includes 2 yards of each of the 3 colors of the 1/2" striped grosgrain ribbon in Bashful Blue, Pumpkin Pie and Real Red. Then there is the 1 1/4" grosgrain ribbon in Pink Pirouette. How about that 7/8" poly-twill ribbon in so saffron...and finally, the Kiwi Kiss double sided satin ribbon! Wow, talk about a variety! Yep, you get 2 yards of each of those. That's a total of 12 yards of ribbon for $11.50.
Contact me ASAP to let me know you're interested! Have a great day and Go Stamp Something!
~Beth

Tuesday, November 4, 2008

Deer Friends

Good morning! Just a quick note of business...GO VOTE! I wont tell you who I voted for, as to spare you all of the additional campaigning, but I will say that I ALWAYS vote PRO-LIFE first!! I believe if we dont restore moral values in this country, the economy will be the least of our concerns.
Now on to the good stuff! This is another card we did at SAS this weekend. I used Riding Hood Red cardstock and layered on a piece of Holiday Treasures DSP which was mounted on a piece of whisper white. I tied the Riding Hood Red taffeta ribbon around both layers. I used the deer from the deer friends hostess set, punched him out with the 1 1/4" circle punch. I layered that on a 1 3/8" punch of old olive and put that on a scalloped circle punch of chocolate chip. Oh, then I added a drop of liquid glue and dipped his nose in red microbeads. He had to look like Rudolph...right? What do you think? Dont you think he's just adorable? Any of those awesome little circle stamps in this set would be stinkin' cute. You could embellish them however you wanted. Give them some glitz and glam and you've got an adorable, easy card. Thanks for stopping by...Have a great day, and Go Stamp Something!
TaTa! ~Beth

Friday, October 31, 2008

Simple White

Todays card is one I made for my Stamp-A-Stack this weekend. I started with an 81/2X51/2 inch of whisper white cardstock and layered on a piece of Always Artichoke cardstock, layered with whisper white. I used Always Artichoke ink to stamp the tree image from the Wondrous Gift stamp set. I used a gold encore pad to stamp the star at the top of the tree. I used a piece of gold elastic cording to wrap around underneath the artichoke layer. I tore the edge of the white, then I took a bone folder and sorta "ripped" the fibers in the cardstock so I could get the folded effect. Next I stamped the sentiment onto a piece of whisper white and layered it on the always artichoke. Very simple! I may actually emboss the tree at SAS, but for now it's just stamped.
You may know that I moonlight at H&R Block during tax season. I had tax class today and I am just tuckered out. I think it takes more effort to sit there and listen than it does actually doing a tax return. We will be meeting most every Friday now up until January when it gets all kinds of crazy!
Have a safe and Happy Halloween. Dont eat so much candy that you get a belly ache, and save me some chocolate!
Have a great weekend!
Go Stamp Something!
~Beth

Tuesday, October 28, 2008

Always & Everything

Hello there! Todays card was made for the SCS color challenge. We were to use Pixie Pink, Kiwi Kiss or Old Olive, (I used Old Olive) and Tangerine Tango or Pumpkin Pie, (I used Pumpkin Pie). I really had issues coming up with something for those colors, as when I think about it it almost makes me kinda gaggy! I decided the only way I could get these colors to look ok was to kinda "blend" them. I used the Rock n Roll technique. To Rock n Roll, you ink your stamp up in whatever solid color you want. Then you go to the coordinating, (or contrasting) color and just roll the edges around in that color. You can see from the image that I inked my stamp up with the Pixie Pink and rolled it around in Pumpkin Pie. I used the Always stamp set and used the berry type stamp on the Old Olive with Old Olive ink.

My sentiment is inked with Pixie pink, layered on Pumpkin Pie, then layered on Old Olive. I attached a clip from Stampin' Ups mini clip assortment and tied a small piece of Old Olive ribbon to it. I also used the corner rounder, with the guard removed to scallop the edges of my cardstock and Summer Picnic DSP. I LOVE that paper!! I hope you enjoy it. Thanks for stopping by.

Now, go Stamp Something! Ta Ta! ~Beth

Monday, October 27, 2008

A Napkin??


Today's post is a the technique lovers challenge over at SCS. The technique was to iron a paper napkin to the shiny side of freezer paper. The challenge part is to use it on a card! LOL!! I got the ironing part down pretty well, but the card part needs lots of work. Ya know how you have a vision in mind and thats what you want to do? Well, I had a vision, something very fallish, but I didn't have any fall napkins. What a bummer! I bet I cabbage on to them every time I find some pretty ones from now on! I can even see using something like this on a scrapbook page. Anyway, perhaps if I could have found a pretty napkin my card would have been nicer...but this is a start, and I'll keep trying.

How is this photo? Is it better than the rest? I'm still trying new angles and lighting to get the best possible photo, so bear with me.

Now, you know what time it is...Go stamp something!

Ta Ta! ~Beth

The Rest of the Set


Here is the remainder of the boxed set I started with. I used Kiwi Kiss to stamp the branch image from Eastern Blooms. Then I removed the rhinestone from the rhinestone brads and just used a glue dot to apply them to the card. Seriously, how easy is that!! Another simple one layer card!

For the Birthday Wishes card, I simply stamped the images from Eastern Blooms in Riding Hood Red and Pink Pirouette. I used the to die for Bella Rose Designer Series Paper and Regal Rose 5/8" grossgrain ribbon. Yeah, big deal, it has two layers...it's still a very easy card to make.

Now for the box...We did a box like this at convention and WOW...It is so easy and so cute. I used Kiwi Kiss cardstock, and Bella Rose DSP that I scalloped the edge of using the new Scalloped Edge Punch from Stampin' Up! I also used the Hidden Garden Rubons on the box. Don't ya just LOVE that ribbon on the box!! I just took a needle and some thread and made long stitches down one edge. I gathered the thread, and as you pull on it (gently) the ribbon will curl into a flower shape. I stitched the edges together and stuck it down with a Pop Up glue dot. I put the rubon on a punched circle, stuck a brad in the middle and wa-la!

There ya have it. Three very simple cards and a box. You could even add a ribbon across the top of the box and it would be like a card purse. How cute, and how nice for a gift!

I know, I know...the photo's are terrible. I'll work on perfecting my picture taking abilities and will be experimenting with different lighting and poses to see what looks the best. Please be patient until then. :)

Now, you know what time it is...Time to go Stamp Something!! Ta Ta! ~Beth

Sunday, October 26, 2008

A New Start?


Ok, so I'm a loser...I've started blogs before and haven't kept up with them, but I decided I needed another new start. So, I've redesigned my page and retitled it, and I hope you enjoy visiting often.

Let's start by showing you a very simple one layer card that I made a little while back. I made this card plus 2 others and a little box to put them in. I gave this set away and really think I need to make some more.

How simple is this! The card base is a 3 1/2X5" piece of Whisper White cardstock. I stamped the grassy image from Inspired By Nature in Kiwi Kiss. Next I stamped my flower from Eastern Blooms in Riding Hood Red and Pink Pirouette. I used the half back pearls from the Pretties Kit with a small glue dot to put in the center of each flower. I used some Linen Thread to wrap around the edge a couple times and stamped the sentiment. Anybody can create a card like this. One layer and three ink colors. Now put on your creative cap and go stamp something.

Ta Ta!